
| Engine types and codes |
– C20NE 2.0 8v 115HP
– C20SEH 2.0 8v 130HP
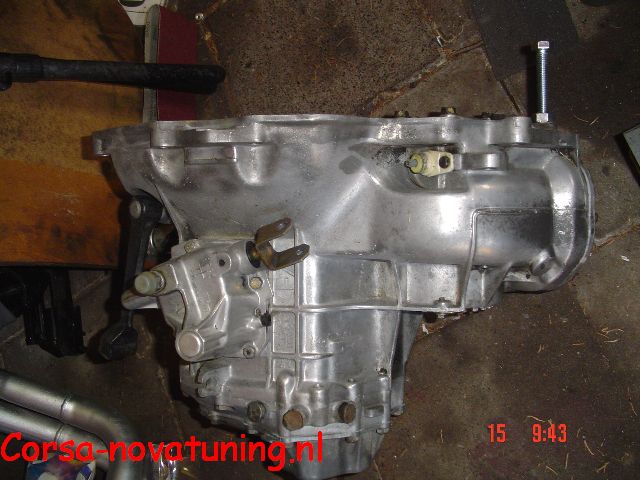
| Transmissions and codes |
In standard form a 2.0 8v is produced with the F16 transmission. Mounting a F20 from a 2.0 16v is also possible.
Attention!! The F16 transmissions have been produced with close and long ratio. Try to find the engine and transmission a one lump. The inner parts of the f16 can’t be interchanged with the parts from the F20 but all connection points, drive shafts, etc, are the same.
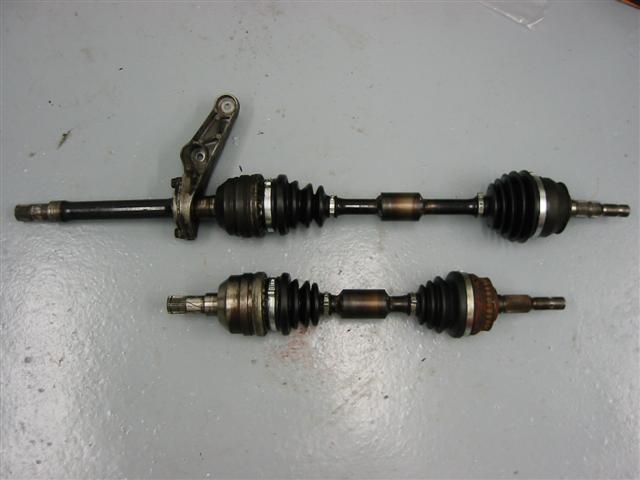
| Drive shafts |
The most easy solution is to easy the Nova 1.6 8v GTE drive shafts in combination with different gearbox CV Joints. With this combination you can re-use the standard Nova hubs. This CV Joint has the big connection for the gearbox and the thin connection for the GTE drive shafts. Attention: Only the GTE drive shafts have the correct number of splines, 22 to exact.
On the standard 2.0 8v you can use the CV Joints of one of the listed vehicles:
Astra 1.6D 1.6DA 1.6S 1.6SV
Astra Max 1.6D 1.6DA
Astra Cabrio 1.6SV
Cavelier 1.6D 1.6DA
Deawoo Nexia
*Only if they have a F16 gearbox attachted to the engine.
Or search for the following SKF item number: VKJA 8724
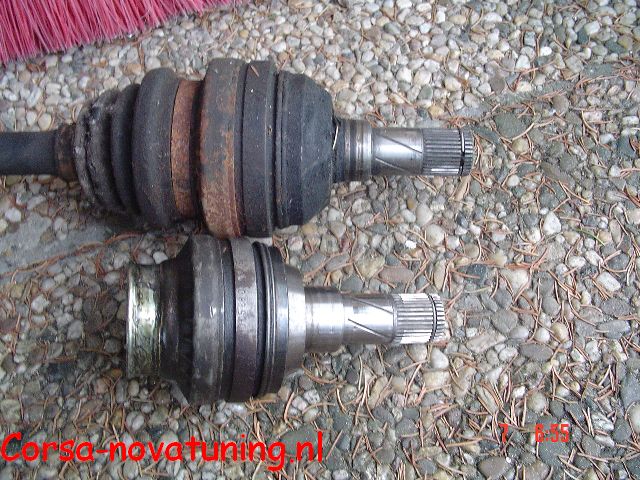
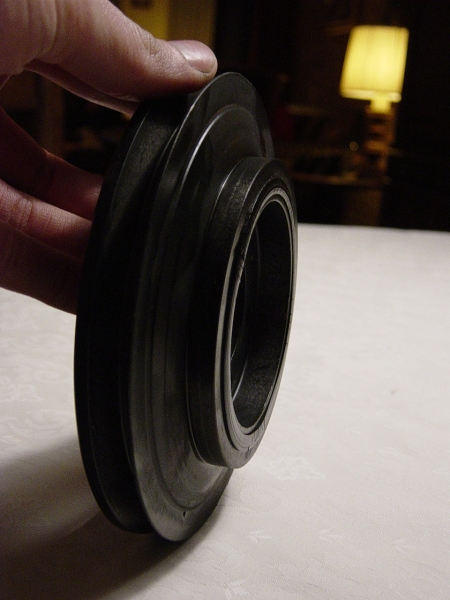
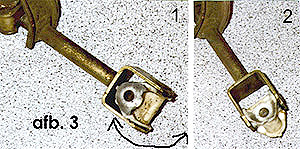
In the upper picture you can see the difference between the standard 2.0 CV Joint (upper) and a diesel CV Joint.
In this upper picture you can see the differnce between the 1.6 GTE CV Joint (lower) and a diesel CV Joint.
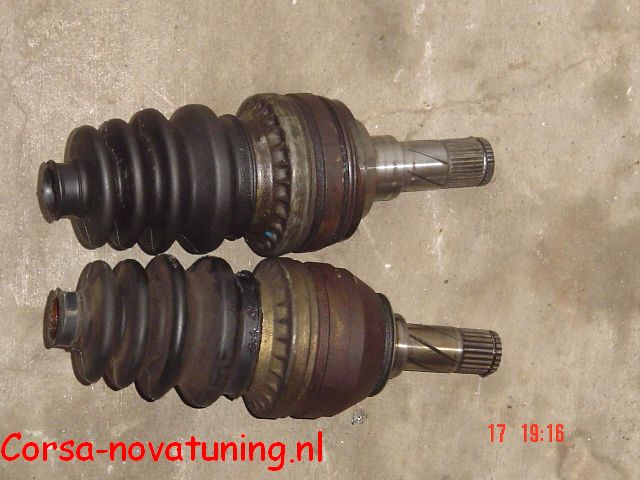
You can also make or buy a new axle. There are 4 options.
1 Use the standard hubs from the nova. Get the thick 1.8/2.0L drive shaft and the standard nova drive shaft and make a new one out of these with the thick side on the gearbox side and the nova side on the wheel side. Lengths are 330 mm and 680 mm (according to Melvin).
2 Use the hubs from a 2.0/1.8 Cavelier/Astra/calibra and turn then down in a lathe to the exact same sizes as the original nova hub.
Make sure not to make the radiuses not to sharp. Use the original nova hub to copy all the dimensions. Caution: The 2.0 hub is 3mm longer then the Nova hub. Make sure you correct this when turning down the hub, otherwise your brake disc will touch the brake caliper, as the hub is 3mm more outside. When changing the hubs the wheel bearing need to be changed as well. You can’t get them of in one piece. (These special hubs are available at M-tech as well). When using the special hubs you’ll need a spacer ring of 3mm between the CV joint and the bearing.
The drive shafts from the 2.0 must be shortened to the sizes 310mm and 660mm.
As an option you can take the two piece drive shaft from the calibra, to reduce the Torque Steer. The length of this drive shaft is: 416mm.
3 Let a local machine shop make completely new axles.
4 buy a set at M-tech or Regal.
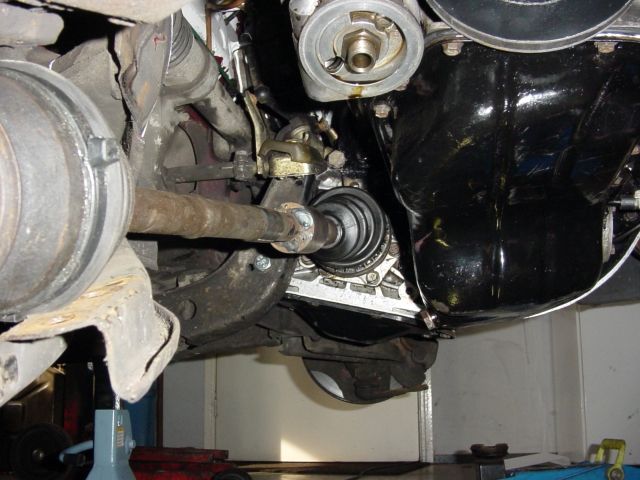
When mounting the drive shafts always follow this procedure:
– Torque central nut to 100 Nm. – Loosen the central nut. – Torque the central nut again to at 20nm – Torque the central nut 90 degrees further.
| Engine supports |
The transmission support on the front left is original nova. Support for the transmission on the rear side is the original nova as well but a spacer of 12 mm and 2 longer bolts are needed.
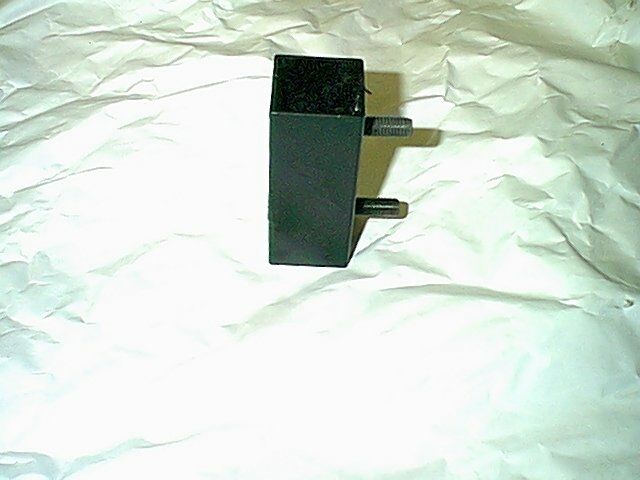
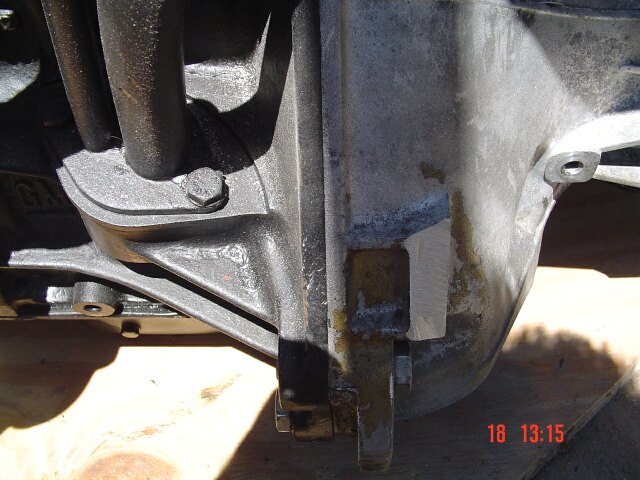
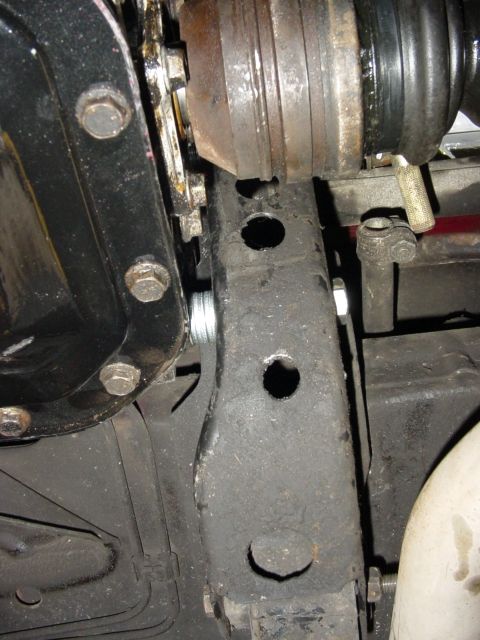 Engine support right front, original Astra with a spacer of 40x40mm box beam and 2 bolts welded in. The pictures show the problem and the solution
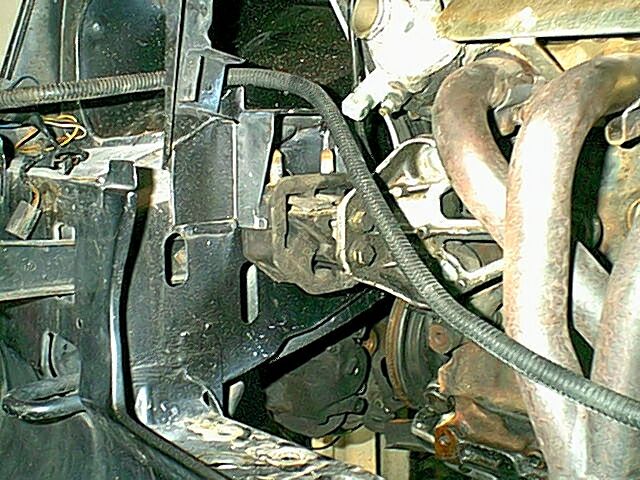
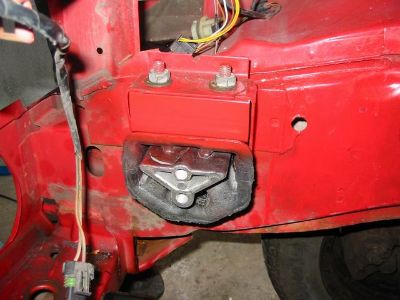
With this support a diesel radiator can’t be fitted!!
Or make a complete new one by drawing (follows later). With this support a diesel radiator can be fitted.
| Anti sway bar |
An anti sway bar can’t be fitted because the exhaust down pipe from the 2.0L engine sits lower. When mounting spacers between the first 2 mounting point at the front of the vehicle the problem will be solved for 99%. Only when the wheels are completely without load the anti sway bar will touch the exhaust.
The spacers are 35mm high and longer bolts are required.
The spacer kit is also available at M-tech.
It is up to you to make the special parts or to buy them.
| Fuel supply |
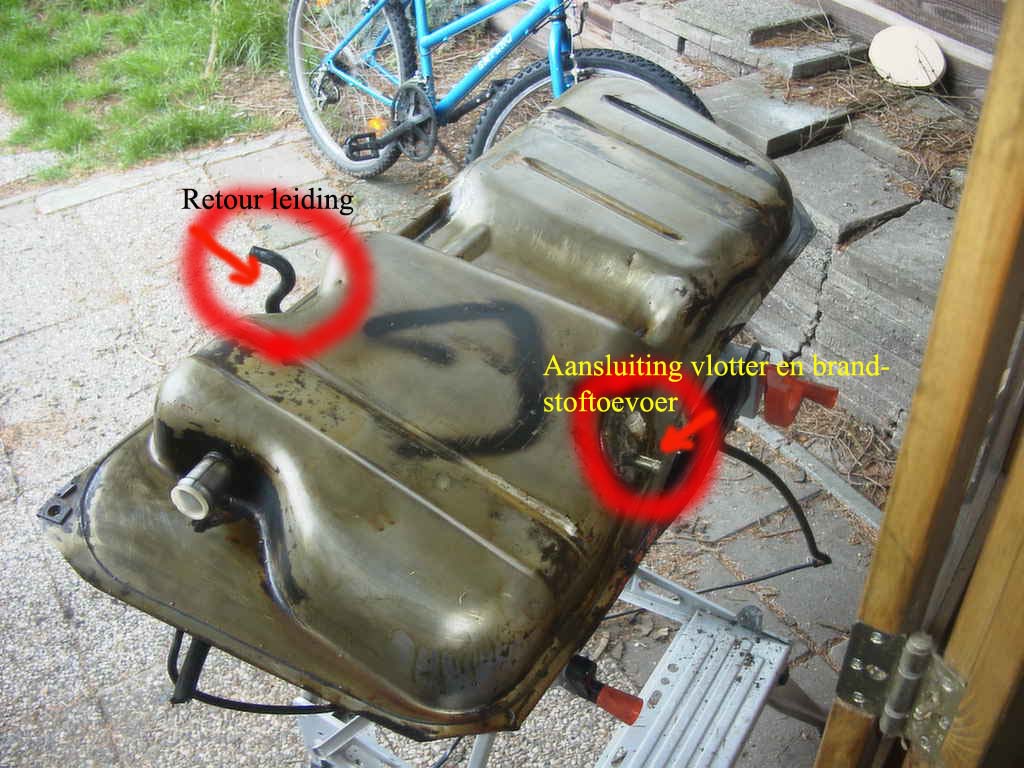
The best way to go is to use the nova GTE fuel tank and not the one from the standard nova. The fuel feed 12mm and return 8mm are bigger compared to the standard 8mm and 6mm tank. The fuel feed is also at a different location, in the rear together with the tank sender unit and not in the front. This sender unit can’t be mounted in the original tank.
Get a new piece of flexible fuel feed line 12mm since this is always dried out. You will also need new 8mm line as well for the pump to the filter to the damper to the plastic line. Be sure to mount a new fuel filter. The plastic return line is 6mm, change this to 8mm, use the feed line from a car from a junkyard. This will give you 2 times 8mm.
If your original car was a carburetted engine pull a new wire from the fuel pump relay to the fuel pump. Use 2.5 square minimums. The wide connector on the fuel pump is the positive, the minus can be mounted to the body of the vehicle, be sure to have a good ground.
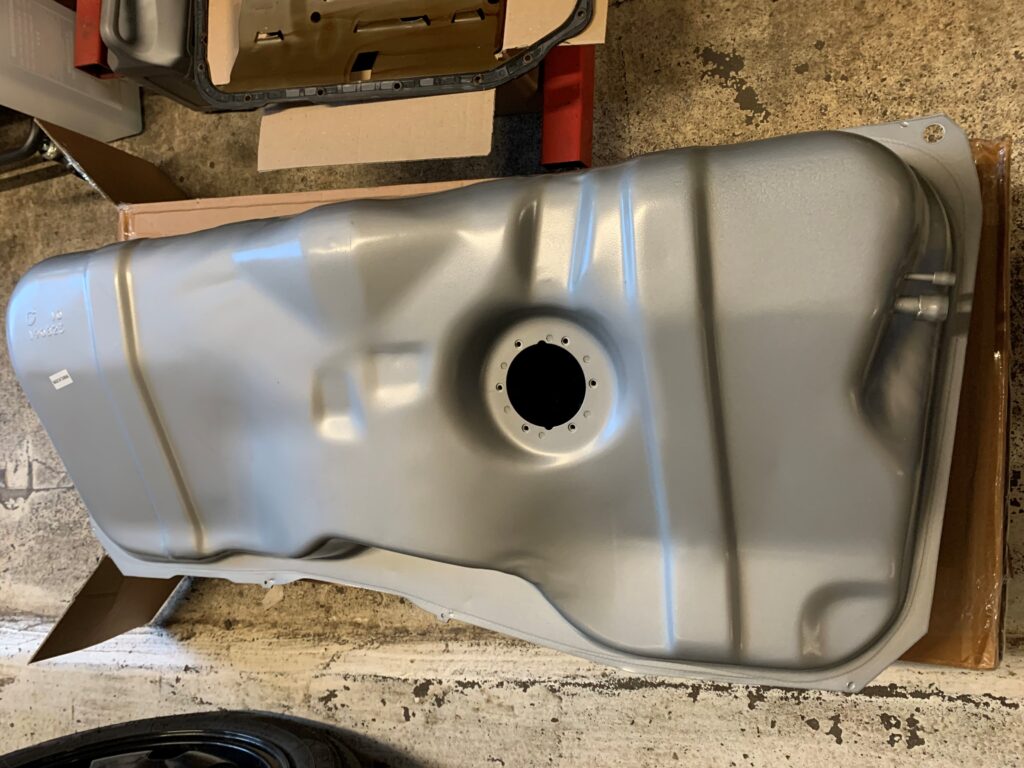
Another option is to use the tank of a later type Nova (A3). These are already equipped with an internal fuel pump (for the c12nz and c14nz engines, among others).
You need to replace the pump with a pump of a multipoint motor. For this you can use the pump of an Astra F GSI.
These fuel tanks can also be purchased new. Please note that the pump and pump holder are not present.
You still have to purchase it separately.
| Coolant system |
The easiest is to use the one from the GTE together with the fan of the GTE. Keeping the original one is also possible but you must be aware of the reduced cooling capacity. Overheating problems can occur during hard driving on hot days. Mounting a fan switch that goes on at a lower temperature can be a solution.
Mounting a diesel radiator is a possibility but is not easy to mount. The combination of a 40x40mm spacer and this radiator is not possible. When mounting a diesel radiator and fan the diesel fan motor can’t be used, use the 1.2/3/4/6 motor and press over the fan blade form the diesel. The thermo switch in the radiator needs to be changed as well for the one from the 2.0l or the original engine. Because of the lower radiator hose mount the bracket on the body of the vehicle needs to be modified and other mounting brackets and holes for the radiator need to be placed in other positions. A new radiator hose also needs to be made.
| Body |
Make room for the alternator pulley. Create more room than you first think is necessary. Be sure to hammer the lower part of the frame inside as well. Nothing is more irritating then the need to create more room when the engine is in place.
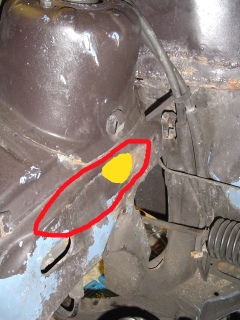
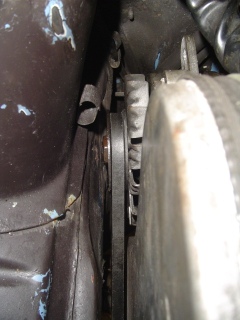
The red area needs to be modified, so that the alternator pulley can run free at the yellow area.
Remove the extension part at the shifting lever if the vehicle used to have a four-speed transmission, this way the mechanism will work for a five-speed transmission as well.
With: 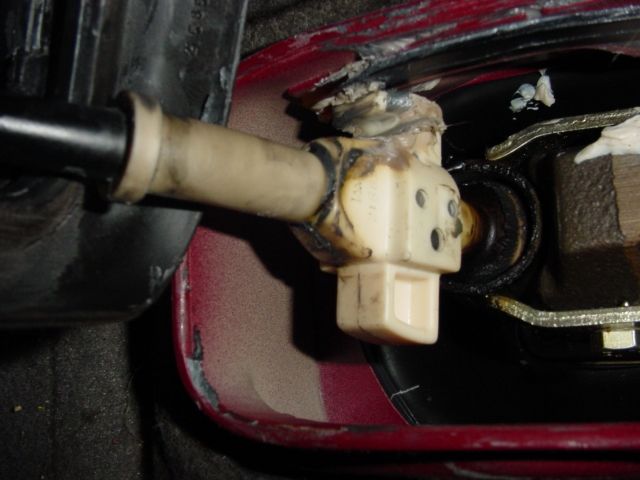
Without:
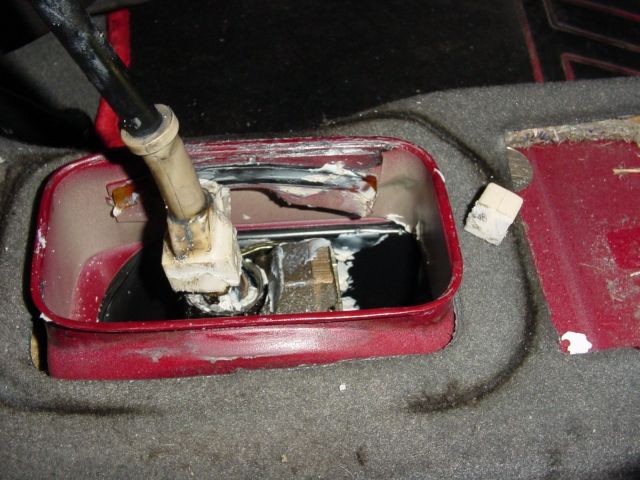
Flip the bolt for the transmission mounting rubber at the front left from front to back, otherwise it will touch the transmission.
Try to mount anti roll bars in the front and the rear of the vehicle.
This can have a positive influence on the driving characteristics. The front suspension bars of a GTE are thicker than the normal ones and the anti roll bars are thicker as well. In general: the firmer the ride the better. The 1.0 and 1.2 are standard not equipped with anti roll bars.
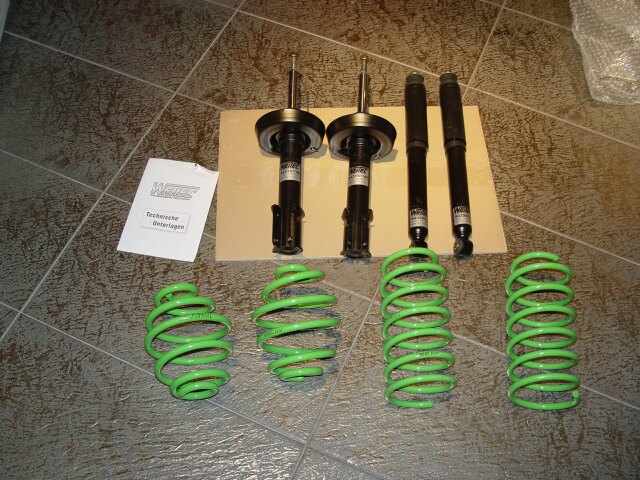
Make sure you mount a good suspension kit, shocks and springs. Think about brands like Apex, Koni, Weitec, FK, Spax etc.
Wheel alignment is a “must do” as you have finished the conversion (GTE Specification).
| Engine and transmission |
Make sure you get some new oil for the engine and transmission, sparkplugs and an oil filter. Check the spark plug leads, rotor and distributor cap, replace if necessary. You can reuse the air filter from the GTE or use something like one from GREEN or K&N, etc. Place the new sparkplugs and oil filter when the engine is mounted to avoid damage during the conversion.
To avoid problems later, mount a new timing belt. The history of maintenance will be set at “0”. At this point when the engine is not in the vehicle it is the easiest to do. Replace the oil pump gasket (use the metal one not the paper) and seal as well. If the oil pan gasket is leaking replace it too.
Turn down the outer V grove of the engine pulley in a lathe (when the pulley is off the timing belt change is even easier).
The main bolt is 9 out of 10 times a torx E20 buy a socket for it.
Remove the 2 cams of the transmission. One is in the way when mounting the cooling fan and the other limits the suspension travel of the left suspension.
Flip over the plastic joint of the gear linkage, this way the whole mechanism has the correct length.
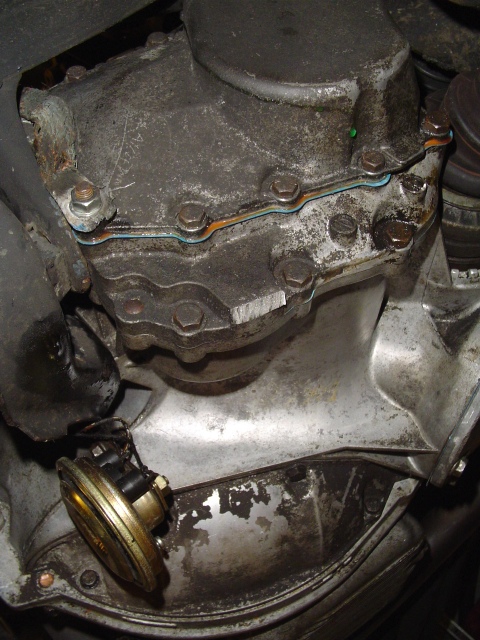
When the engine is mounted, replace the oil of the engine and the transmission. Normally the oil needs to flow out of the transmission when you remove the drive shafts. 9 out of the 10 times that amount of oil is missing. Remove the cover of the differential, replace the gasket and refill the transmission till it drips out of the check hole beside the right drive shaft.
Should be 1.7 litres.
Refilling goes easiest via the bleed air hole in the shifting fork housing on top of the transmission.
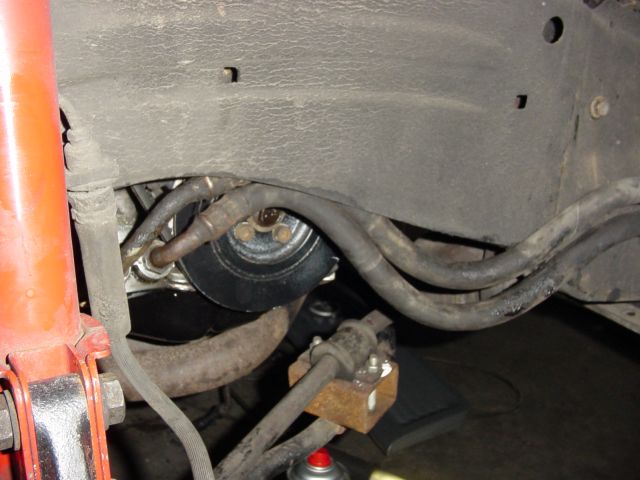
Oil cooler can be reused from the Astra.
The lines off an oil cooler:
| Electrical wiring |
Use the black + from the original wiring from the ignition coil as the “key on +“ for the ECU (black also). For the tachometer you can use the green one. If you don’t have an oil pressure gauge use the oil pressure switch from the original engine. Use the thicker red/blue from the relay for the + of the fuel pump.
The original wiring from the nova can be used for the oil pressure, coolant temp, alternator and starter. An extra red constant + wire for the ECU needs to be connected to the 2.0 wiring loom. The rest shows itself.
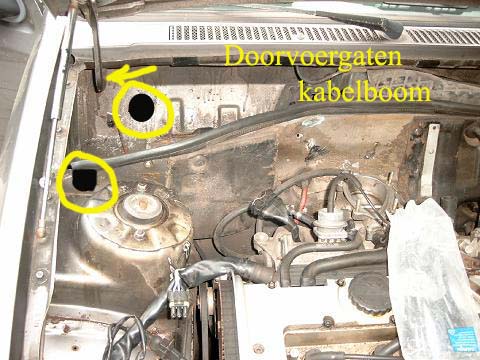
To mount the ECU in the vehicle the loom needs to go through the bulkhead.
Pay a lot of attention on the place where the hole will be drilled. The bonnet hinge may not touch the loom in closed position. In the second part of the bulkhead a small section needs to be cut out.
Color coding: With Vauxhall/Opel engines and car looms the wiring is almost always color by color. Below the meaning of the wires:
| Colorcoding |
Meaning |
| Brown / Yellow | Diagnostic |
| Brown / White | Diagnostic |
| Brown / Blue | Motronic check light in Dashboard *From the Nova loom, connect to the brown / white wire from the dashboard |
| Red | Constant + |
| Green | RPM Signal |
| Red / Blue | Fuel Pump |
| Blue | Cooling water temperature |
| Black | Switched + |
| Black / Red | Startmotor |
| Blue / Green | Oilpressure light |
| Blue / White | Alternator |
| Blue / Yellow | Olipressure Gauge (optional) |
| Brown | Ground |
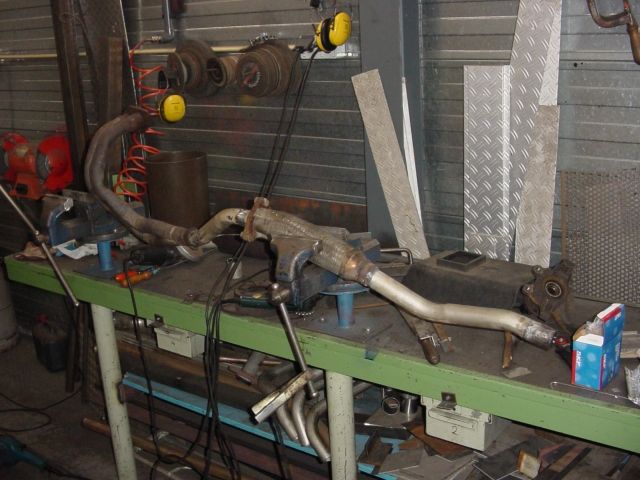
| Exhaust |
The original front manifold pipe needs to be slightly modified since the O2 sensor will touch the underside of the car. You can choose to make an exhaust yourself, use the standard one or place an aftermarket sport unit with a bigger diameter. Make sure it hangs without any tension in the rubber mounts. Don’t make it TOO loud, the cops will pull you over every time they see you and that is very annoying.
| Brakes and tires |
Use the front brakes of the 2.0 litre donor vehicle and they are a direct replacement fit. Be aware that the minimal rim diameter will become 14”. Mount new copper rings at the brake lines.
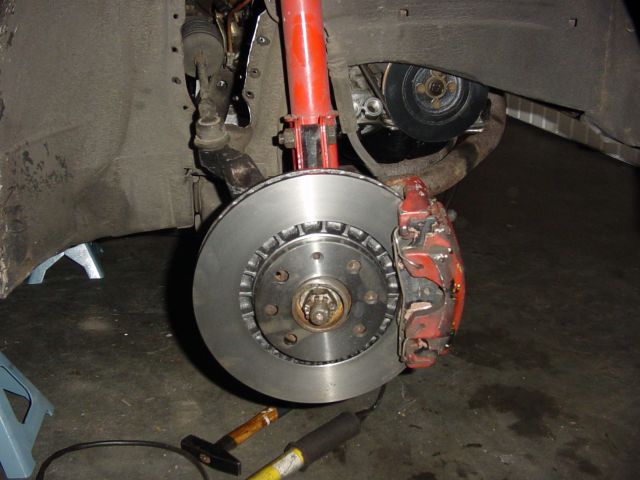
Pay attention to the air bleeders when buying the callipers. If the air bleeders are broken or damaged don’t buy them. Trying to get this fixed is a nightmare. The same goes for the pistons, if they are completely stuck don’t buy them. Make sure the seals are ok. When using used brakes don’t mix the parts, they are worn in on each other.
Rear brakes can be left as they are but inspect then to be sure they work.
Diesel rear brakes have bigger cylinders and give a little more brake pressure (use only when needed).
Pay attention to the tires that you use. Code H= 210 km/h (140 MPH) Maximum!!! Code V= 240 km/h (150 MPH) Maximum!!
| Words of advise |
Just some words of advise, do with it what YOU think you should be the best.
When the conversion is done and you are ready for the first test-drive let the engine get to temperature and don’t start driving like a lunatic. You are not aware of what that car will perform, especially when you have never driven a 2.0 nova before. All the parts need to settle and run in and check first if every thing is ok, you might have forgotten a small thing. Just double-check everything!! Don’t forget to put on your seat belt during the test-drive, especially at the brake test or you’ll need a new windscreen.
Pushing the accelerator pedal to the floor the first time is something you will remember for a long time. It gives a really good feeling so enjoy it since you have worked hard for it!!
Check your local laws on engine transplants and contact your insurance company if needed.
My own experience with driving a 2.0 litre nova is, the more normal you drive
(music, seat belts, not aggressive) and the less extreme the vehicle is build up (neon, illegal lights, loud exhaust) the less chance of getting pulled over by the cops. Making a burn out next to an officer is asking for trouble. If you can show the papers, wear a seat belt, have the music volume low or turned off and your co-pilots act normal (can be hard after a good night out and they’re all pissed), they will always let you go with out any trouble.
Anyway, driving a 2.0 litre nova is just plain fun. Blowing away other cars at the traffic lights is brilliant. The element off surprise to your opponents is even better with a standard looking car.
Cheers have fun.
