
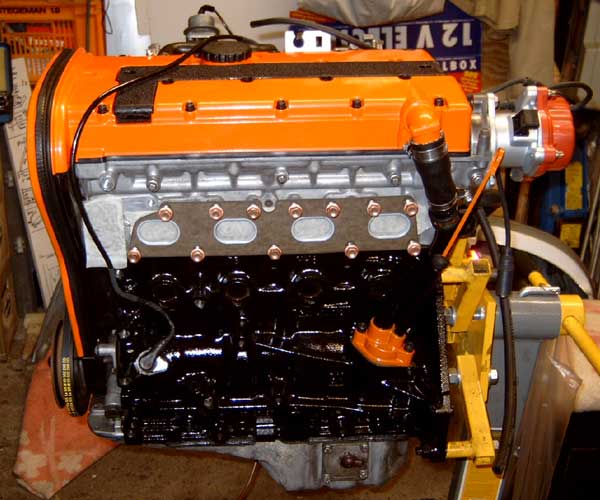
| 2.0 16v Engines and engine code |
C20XE 2.0 16V 150PK
Some questions may rise why not the more powerfull 20XE (156HP) is not listed. The 20SEH is not lambda controlled and therefore it will not meet the emission standards required for this car. (this does not apply for all countries in the world).
C20LET 2.0 16V Turbo 204HP (this conversion is not described since you’ll need to use a different gearbox and a lot of other modifications)
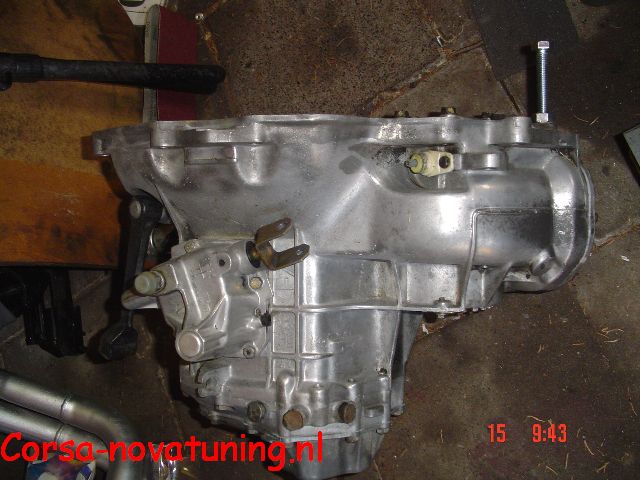
| Transmissions and codes |
In standard form a 2.0 16v is produced with the F20 transmission.
Mounting a F16 from a 2.0 8v is also possible but the transmission is a little weaker).
Attention!! The F16 transmissions have been produced with close and long ratio. Try to find the engine and transmission a one lump. The inner parts of the f16 can’t be interchanged with the parts from the F20 but all connection points, drive shafts, etc, are the same.
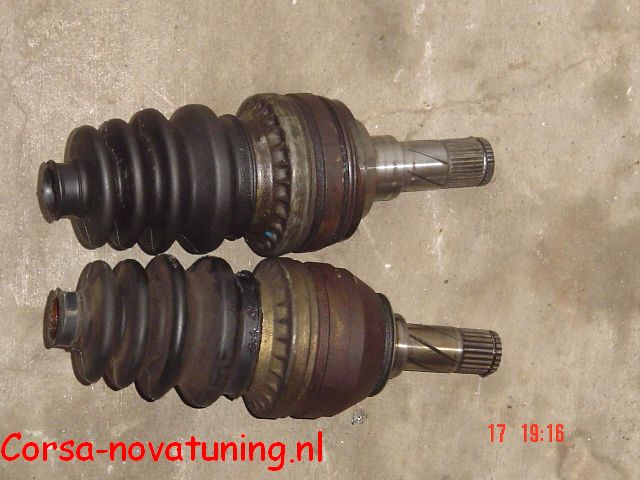
| Drive shafts |
The most easy solution is to easy the Corsa 1.6 16v GTE drive shafts in combination with different gearbox CV Joints. With this combination you can re-use the standard Corsa hubs. This CV Joint has the big connection for the gearbox and the thin connection for the GTE drive shafts. Attention: Only the GTE drive shafts have the correct number of splines, 22 to exact.
On the standard 2.0 8v you can use the CV Joints of one of the listed vehicles:
Astra 1.6D 1.6DA 1.6S 1.6SV
Astra Max 1.6D 1.6DA
Astra Cabrio 1.6SV
Cavelier 1.6D 1.6DA
Deawoo Nexia
*Only if they have a F16 gearbox attachted to the engine.
Or search for the following SKF item number: VKJA 8724
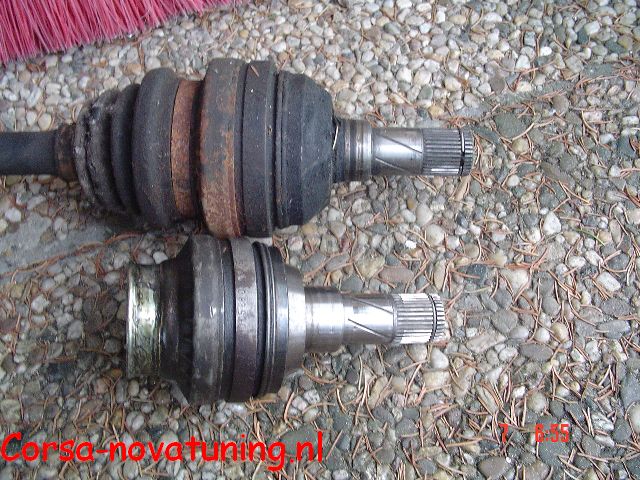
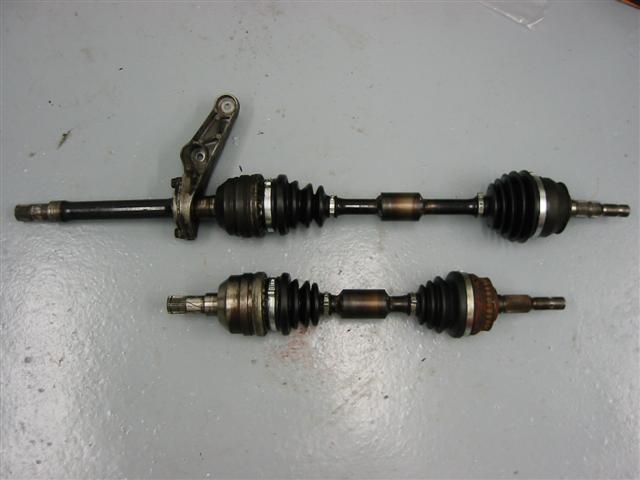
In the upper picture you can see the difference between the standard 2.0 CV Joint (upper) and a diesel CV Joint.
In this upper picture you can see the differnce between the 1.6 GTE CV Joint (lower) and a diesel CV Joint.
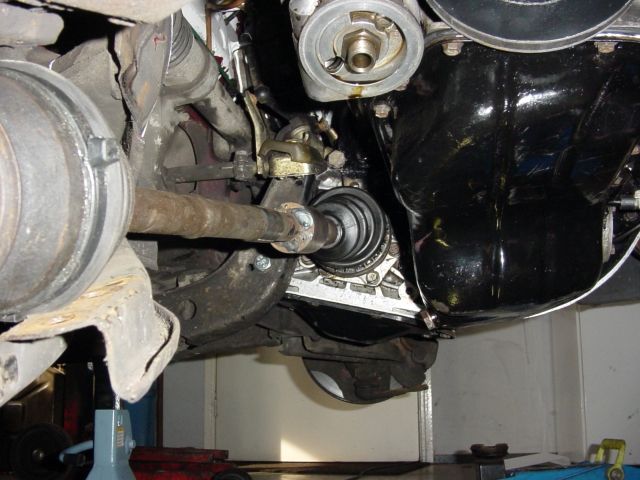
You can also make or buy a new axle. There are 4 options.
1 Use the standard hubs from the nova. Get the thick 1.8/2.0L drive shaft and the standard corsa drive shaft and make a new one out of these with the thick side on the gearbox side and the corsa side on the wheel side. Lengths are 340 mm and 690 mm (Lenghts are not 100% sure, soon more info).
2 Use the hubs from a 2.0/1.8 Cavelier/Astra/calibra and turn then down in a lathe to the exact same sizes as the original Corsa hub.
Make sure not to make the radiuses not to sharp. Use the original nova hub to copy all the dimensions. Caution: The 2.0 hub is 3mm longer then the Corsa hub. Make sure you correct this when turning down the hub, otherwise your brake disc will touch the brake caliper, as the hub is 3mm more outside. When changing the hubs the wheel bearing need to be changed as well. You can’t get them of in one piece. (These special hubs are available at M-tech as well). When using the special hubs you’ll need a spacer ring of 3mm between the CV joint and the bearing.
Only the short drive shaft from the 2.0 must be shortened to the sizes 340mm.
The long drive shaft can be used from an Astra. This drive shaft has a length of 690mm.
As an option you can take the two piece drive shaft from the calibra, to reduce the Torque Steer. The length of this drive shaft is: 446mm.
3 Let a local machine shop make completely new axles.
4 buy a set at M-tech, Regal or Chris Astley Motorsport.
When mounting the drive shafts always follow this procedure:
– Torque central nut to 100 Nm. – Loosen the central nut. – Torque the central nut again to at 20nm – Torque the central nut 90 degrees further.
| Engine Mounts |
There are 2 different body types. All the Corsa GSI are always body type 2. All the Corsa’s with power steering are also body type 2.
The different between the two body types are easy verify. Body Type 1 is an outside engine mount. Body Type 2 is an inside engine mount.
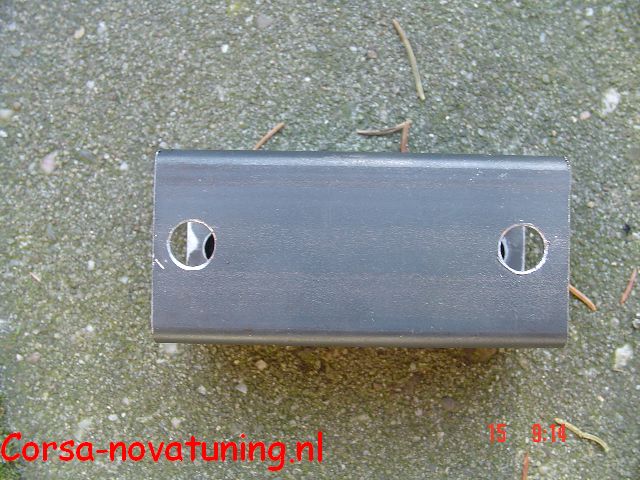
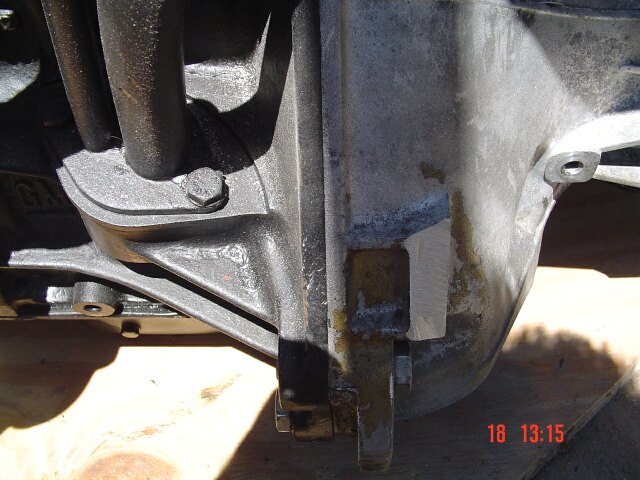
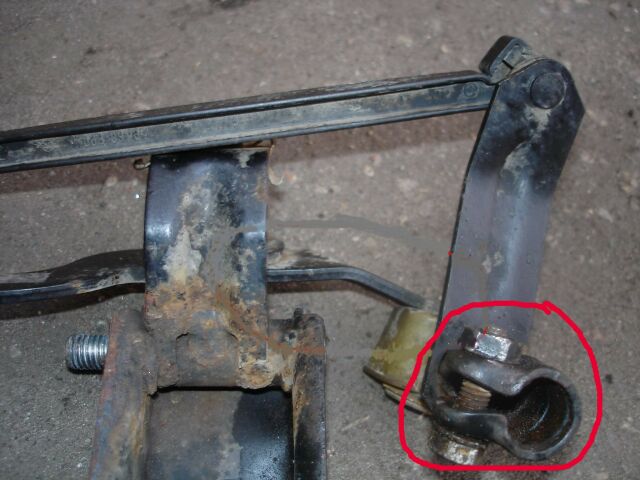
Gearbox mount front left, use original corsa. Gearbox mount mid-rear, original corsa with a spacer of 12mm between de gearbox and the mount. Use longer bolts.
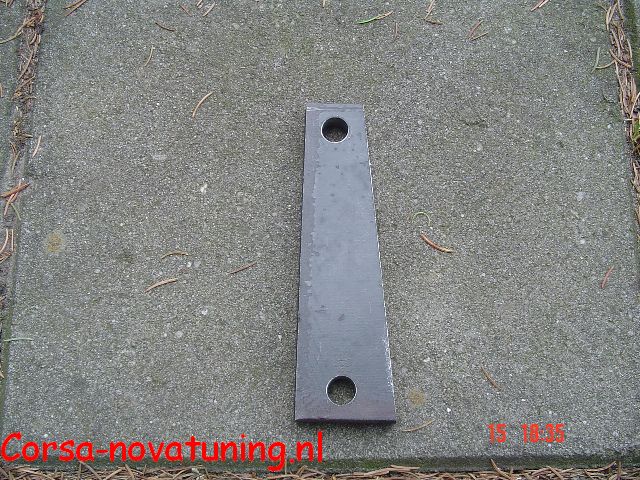
At the picture above, you see the 12mm spacer for the mid-rear gearbox mount.
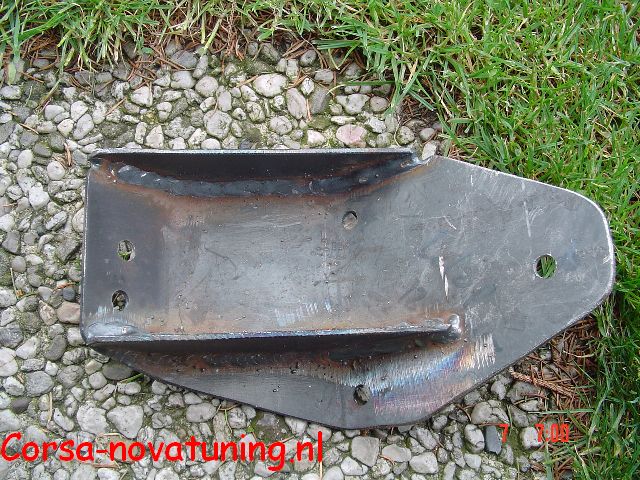
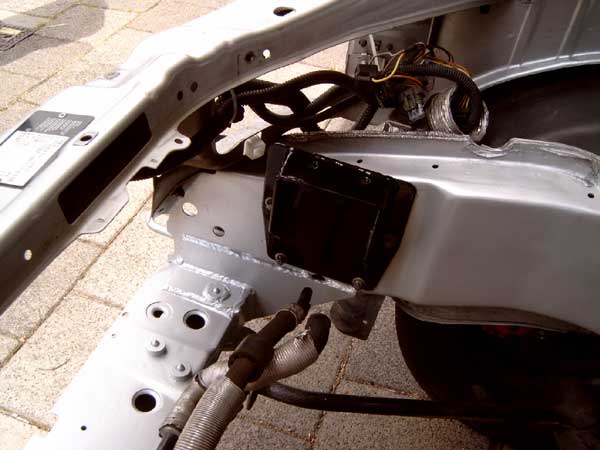
At the picture above you see the engine mount.
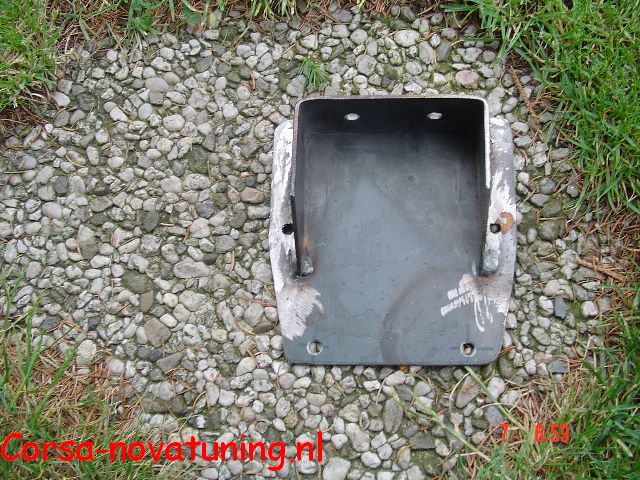
At the picture above you see the Chassis Bracket. Body Type 2.
When you have Body Type 2, you also need to use a rubber mount of a Nova. You can buy these rubber mounts new or an the breaker. When you choose to use an used rubber mount, check first that the rubber mount is not torn.
Some cars have power steering and air conditioning. For the power steering you need a special mount. The drawing will be online soon. The air conditioning has to be removed. Let the system be emptied by a proper service station.
| Anti sway bar |
An anti sway bar can’t be fitted because the exhaust down pipe from the 2.0L engine sits lower. When mounting spacers between the first 2 mounting point at the front of the vehicle the problem will be solved for 99%. Only when the wheels are completely without load the anti sway bar will touch the exhaust.
The spacers are 35mm high and longer bolts are required.
The spacer kit is also available at M-tech or Chris Astley Motorsport.
 At the picture above you will see the spacer.
It is up to you to make the special parts or to buy them.
| Body work |
Some types are equipped with an electronic odometer. This does not work in combination with an F16, F18 or F20 gearbox. It is then necessary to install an older type of odometer with a mechanical cable. There must also be drilled a hole near to the master brake cylinder.
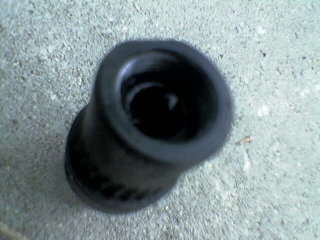
Corsa-B conversion to C20XE with retention of original electric dashboard, so no drilling for the tachometer cable. Some Corsa (x14xe / x16xe) are equipped with a mechanical worm wheel on the box, but in the car electric counters 0> 220 km / h. With the help of the Pulse generator below you can keep the original dashboard:
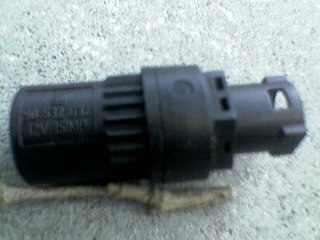
Place this on the gearbox
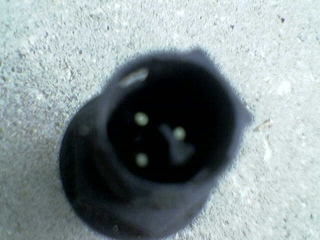
Place the plug of your dashboard (cable harness that also contains the starter motor wiring) and go in on this side:
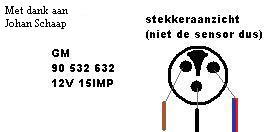
If you have a different plug now, you have to convert your current one. GM number of the encoder and color scheme of the connector:
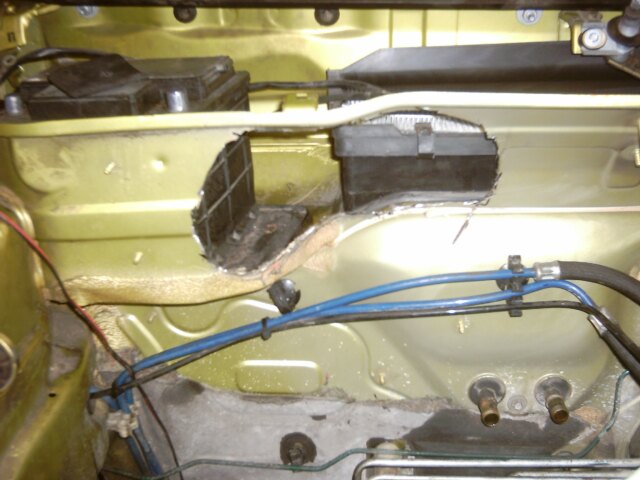
Cut off 1.5 to 2 cm of the heater core pipe otherwise you can’t reconnect the heater hose. Make sure the edges are not sharp.
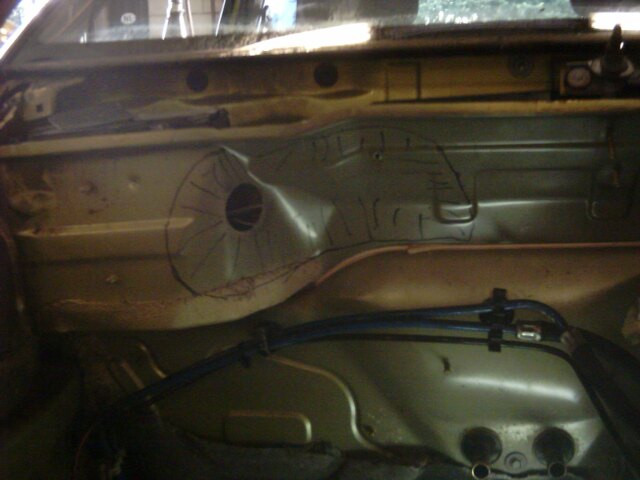
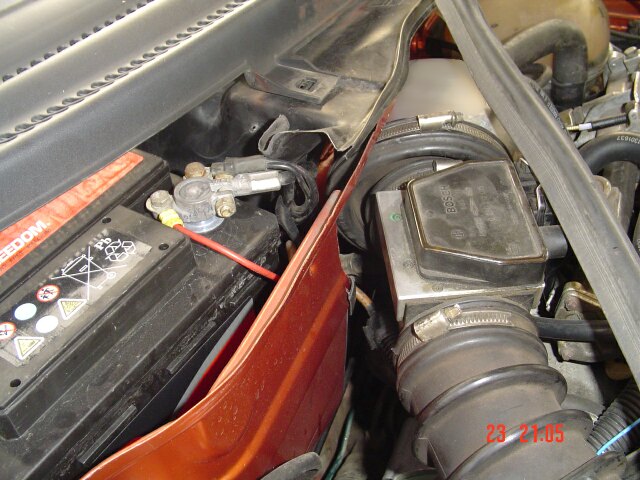
Firewall modification
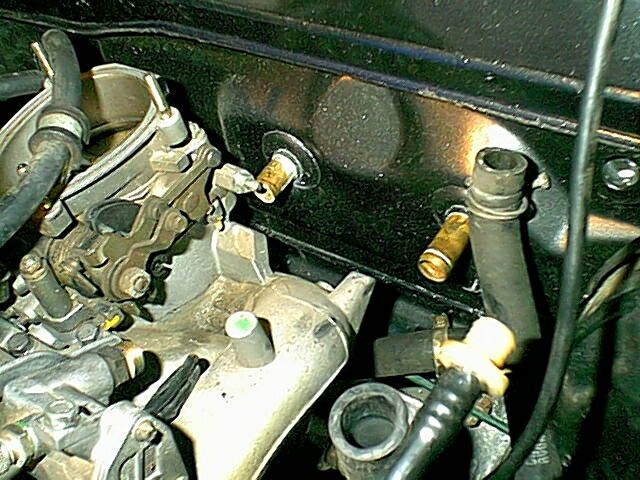
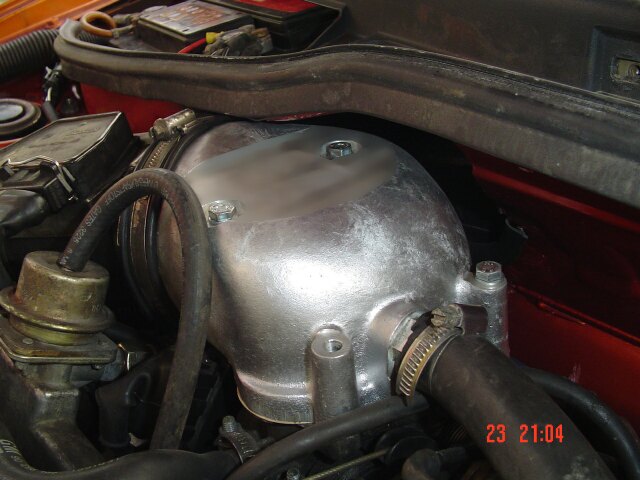
To mount the engine you will need to cut a hole in the firewall. On the pictures below you clearly see where and why these has to be made. Also a standard SFI Box doesn’t fit anymore, so you need to mount a Powercap.
Try to mount anti roll bars in the front and the rear of the vehicle.
This can have a positive influence on the driving characteristics. The front suspension bars of a GTE are thicker than the normal ones and the anti roll bars are thicker as well. In general: the firmer the ride the better. The 1.2 8v versions are standard not equipped with anti roll bars.
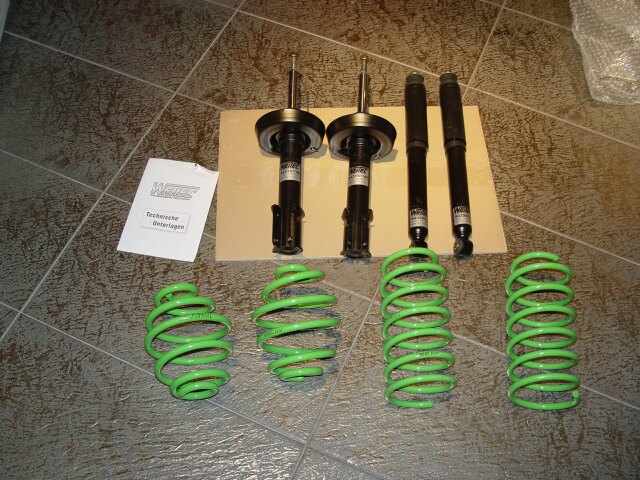
Make sure you mount a good suspension kit, shocks and springs. Think about brands like Apex, Koni, Weitec, FK, Spax etc.
Wheel alignment is a “must do” as you have finished the conversion (GTE Specification).
| Engine + transmission |
Make sure you get some new oil for the engine and transmission, sparkplugs and an oil filter. Check the spark plug leads, rotor and distributor cap, replace if necessary. You can reuse the air filter from the GTE or use something like one from GREEN or K&N, etc. Place the new sparkplugs and oil filter when the engine is mounted to avoid damage during the conversion.
To avoid problems later, mount a new timing belt. The history of maintenance will be set at “0”. At this point when the engine is not in the vehicle it is the easiest to do. Replace the oil pump gasket (use the metal one not the paper) and seal as well. If the oil pan gasket is leaking replace it too.
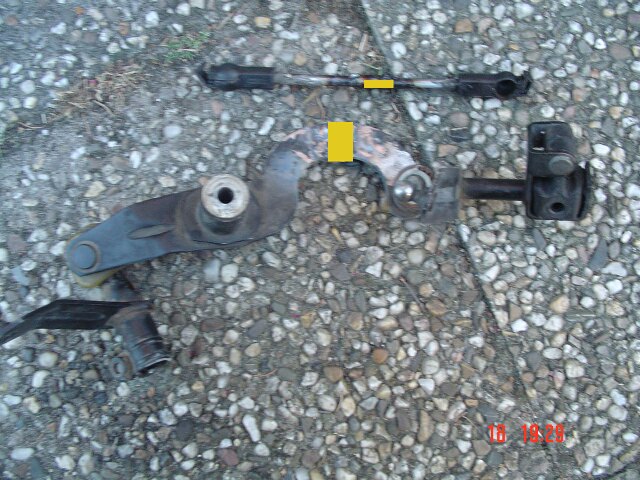
Remove the 2 cams of the transmission. One is in the way when mounting the cooling fan and the other limits the suspension travel of the left suspension.
The gear linkage needs to be lengthened by 15mm. Some models are equipped with a plastic rod, this needs to be changed with a metal rod. The linkage and rod both need to be lengthened.
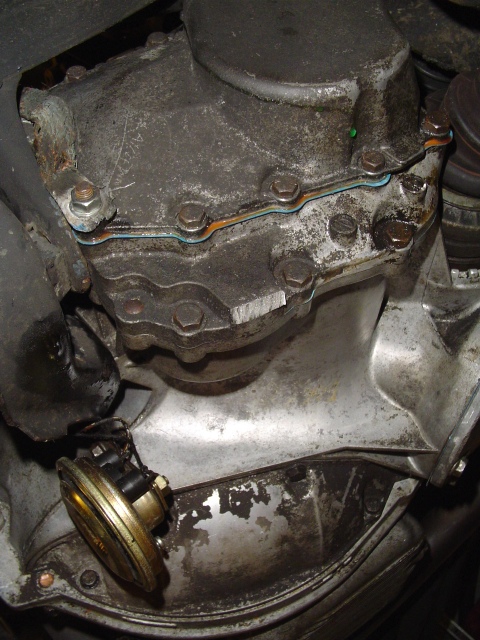
When the engine is mounted, replace the oil of the engine and the transmission. Normally the oil needs to flow out of the transmission when you remove the drive shafts. 9 out of the 10 times that amount of oil is missing. Remove the cover of the differential, replace the gasket and refill the transmission till it drips out of the check hole beside the right drive shaft.
Should be 1.7 litres.
Refilling goes easiest via the bleed air hole in the shifting fork housing on top of the transmission.
Oil cooler can be reused from the Calibra / Vectra. Note when the engine comes from an other donor you need a different thermostaathuis
It is possible to leave out the oil cooler. Remove oil thermostat housing and change the bolt for a shorter one (available at the dealer). Beware that long time high speed driving (German autobahn) can cause hot oil.
| Adjustment of the gearbox |
Remove the shifterboot . At the picture below you can see the blocking position of the shifter. Be sure that the shifter at these positions will be locked.
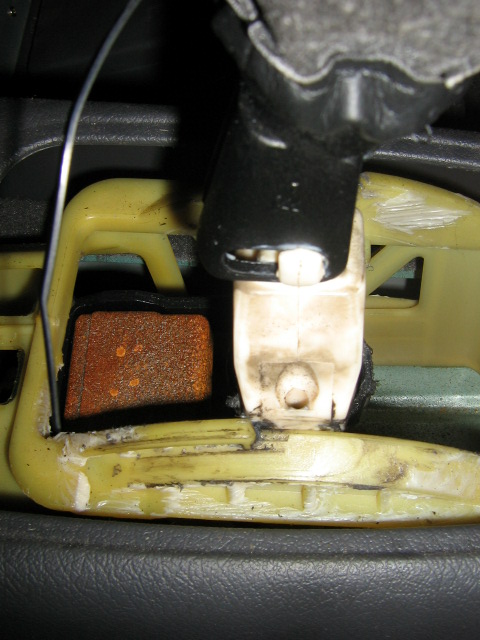
This can be done with a thin screwdriver or with a drill bit. As you can see, the shifter will be positioned between the first and second gear.
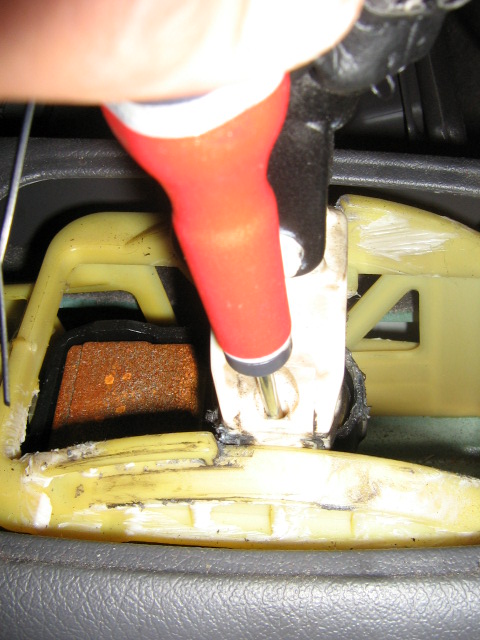
On the gearbox is a blocking mechanism. Turn the fork on the gearbox to the left as far as you can till you can push in the blocking pin.
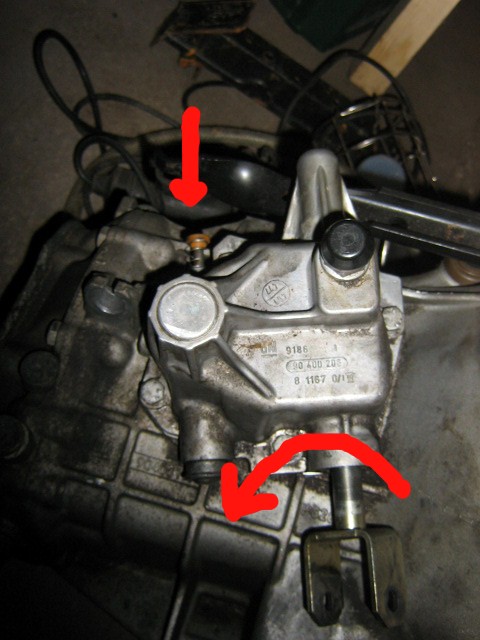
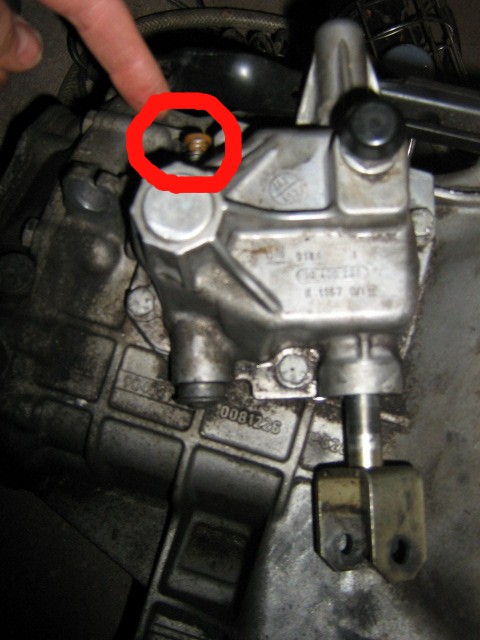
Now you can lock the bolt which holds the shifting lever and shifting mechanism together. On the picture below you can see which bolt this is.
| Fuel System |
When the vehicle has one of the following engine codes (check registration papers) the fuelsystem does not need to be changed:
C16XE X16XE X14XE
When the vehicle is not fitted with one of the engines mentioned above you need to change the fuelpump with with one from the above mentioned engines.
The replacement of the fuelpump is very easy. Remove the bottom rear seat and you have access to the pump. When the pump is changed the fuel system is capable of feeding the bigger engine.
| Cooling system |
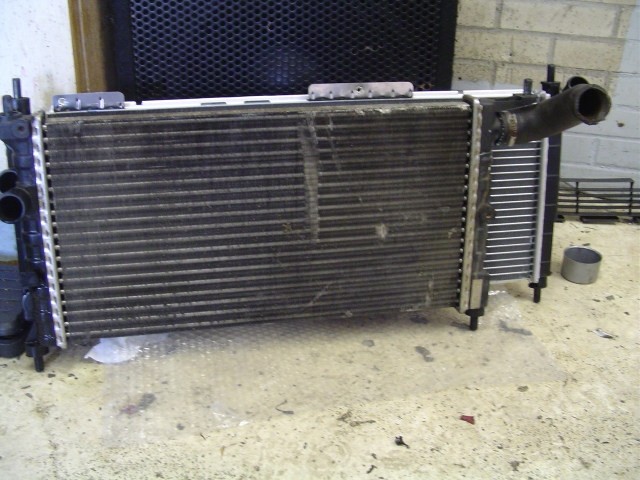
For a good cooling it is wise to use one of the radiators of the following engine types.
C16XE X16XE X14XE
When the vehicle is not fitted with one of the engines mentioned above you need to change the radiator with with one from the above mentioned engines.
If you are going to tune your engine extremely, we advise you to purchase a radiator of an x16xe with air conditioning. You can then connect your radiator to your thermostat with an original Opel curling hose. Article number 1337388 Astra F c18nz <1997
Difference x16xe <=> X16xe airco radiator:
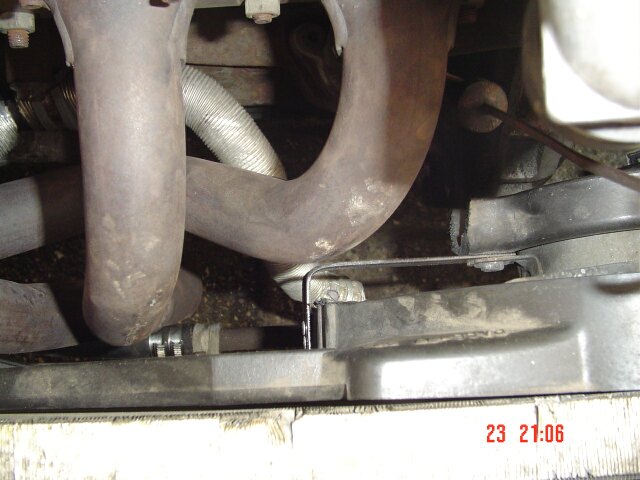
The holder of your fan will have to be adjusted slightly. If it gets too weak, the photo below is a solution.
| Electric |
On a Corsa B it is possible to get the wiring sorted like it was original.
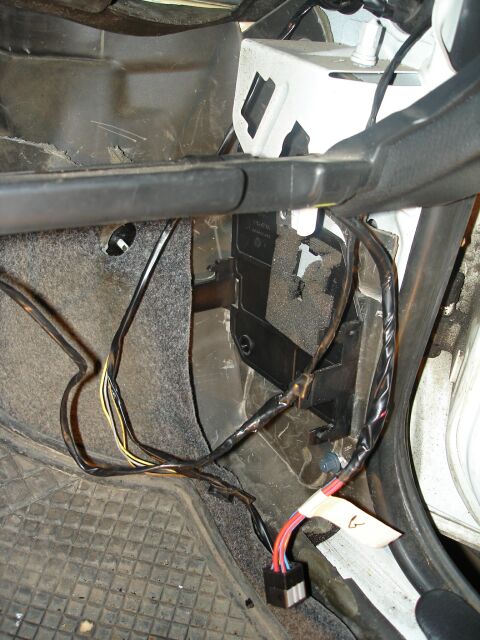
On the right side under the dashboard behind the plastic kicker panel is position of the ECU. On this position is also the connector that needs to be soldered to the 2.0 wiring. When it is possible to get this connector at a breaker you can prepare the wiring before putting in the engine and it will only be plug and play.
Our advise is to use the wiring from a astra F, vectra/cavalier or calibra. Because these wiring looms have almost the same connections as the Corsa wiring loom.
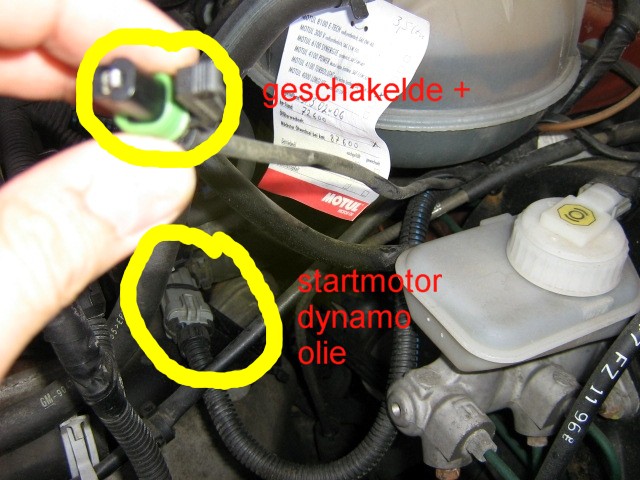
Colour coding: The wiring of the Vauxhall and Opel is very simple, the main wiring is colour on colour. Below the purpose of the wires in the connector:
| Colour | Purpose |
| Brown / yelow | Diagnose |
| Brown / White | Diagnose |
| Brown / Blue | Motronic light dashbord |
| Red | Battery + |
| Green | RPM Signal |
| Red / Blue | Fuel pump |
| Blue | Coolend temperature |
 |
|
| Black | Switched + |
 |
|
| Black / Red | Starter |
| Blue / Green | Oil pressure light |
| Blue / White | Alternator |
| Blue / Yellow | Oil pressure gauge (optional) |
| Brown | Ground |
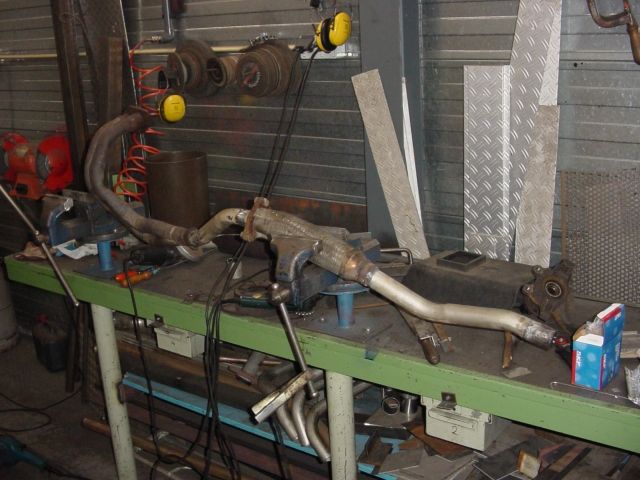
| Exhaust |
The original front manifold pipe needs to be slightly modified since the O2 sensor will touch the underside of the car. You can choose to make an exhaust yourself, use the standard one or place an aftermarket sport unit with a bigger diameter. Make sure it hangs without any tension in the rubber mounts. Don’t make it TOO loud, the cops will pull you over every time they see you and that is very annoying.
| Brakes and Tires |
Use the front brakes of the 2.0 litre donor vehicle and they are a direct replacement fit. Be aware that the minimal rim diameter will become 14”. Mount new copper rings at the brake lines.
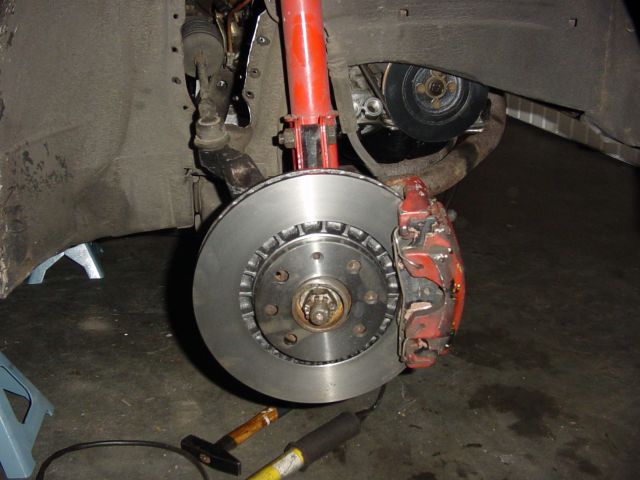
Pay attention to the air bleeders when buying the callipers. If the air bleeders are broken or damaged don’t buy them. Trying to get this fixed is a nightmare.
The same goes for the pistons, if they are completely stuck don’t buy them. Make sure the seals are ok. When using used brakes don’t mix the parts, they are worn in on each other.
Rear brakes can be left as they are but inspect then to be sure they work.
Diesel rear brakes have bigger cylinders and give a little more brake pressure (use only when needed).
Pay attention to the tires that you use. Code H= 210 km/h (140 MPH) Maximum!!! Code V= 240 km/h (150 MPH) Maximum!!
| Words of advise |
Just some words of advise, do with it what YOU think you should be the best.
When the conversion is done and you are ready for the first test-drive let the engine get to temperature and don’t start driving like a lunatic. You are not aware of what that car will perform, especially when you have never driven a 2.0 nova before. All the parts need to settle and run in and check first if every thing is ok, you might have forgotten a small thing. Just double-check everything!! Don’t forget to put on your seat belt during the test-drive, especially at the brake test or you’ll need a new windscreen.
Pushing the accelerator pedal to the floor the first time is something you will remember for a long time. It gives a really good feeling so enjoy it since you have worked hard for it!!
Check your local laws on engine transplants and contact your insurance company if needed.
My own experience with driving a 2.0 litre nova is, the more normal you drive
(music, seat belts, not aggressive) and the less extreme the vehicle is build up (neon, illegal lights, loud exhaust) the less chance of getting pulled over by the cops. Making a burn out next to an officer is asking for trouble. If you can show the papers, wear a seat belt, have the music volume low or turned off and your co-pilots act normal (can be hard after a good night out and they’re all pissed), they will always let you go with out any trouble.
Anyway, driving a 2.0 litre nova is just plain fun. Blowing away other cars at the traffic lights is brilliant. The element off surprise to your opponents is even better with a standard looking car.
Cheers have fun.
